Showing posts with label patchwork. Show all posts

Sunday, 18 August 2013

Large nine-patch quilt - stage 1

I've started work on some bunting today - can't tell you more at the moment because it's going to be a present.

What I can share with you is the news that I have finally (having started them last summer) finished all 16 of the framed nine-patch blocks for a large quilt I am planning.  There is still a lot to do, but this is a very pleasing milestone to have reached.

quilting


Oxfam used to sell recycled cotton squares (part of its Ethical Collection). I was so taken with the patterns, I bought several packs with no particular project in mind and put them away in my sewing basket for the proverbial rainy day.  When I set myself the challenge of making a banner for my friend to take with her when she went campaigning for the group Women for Whales, the blue and white patterened squares were perfect for a whale.

I knew I wanted to use the rest of the squares for quilting, but the question was what patchwork design.  I toyed with various ideas, but in the end I went for nine-patch blocks.  I felt that these were the best use of the fabric as this design made the most of the pre-cut squares and was the best way of showing off the varied, fabulous patterns.

The idea of framing the squares came later (an idea from my Mother), and for this I used unbleached calico.  I think it frames the squares perfectly.  You can buy pre-washed calico quite cheaply - I got mine from Doughty's.


quilting
Excluding seam allowance, each framed block measures 40x40cm

The next step will be to quilt each square before joining them together.  I did the patchwork by hand, but I may do the quilting by machine.


quilting

There are still decisions to make - what quilting design to use, what to use as a backing fabric, and what fabric to choose to join the squares.  As ever, I'll let you know how this project progresses...


Sunday, 21 October 2012

Seeing hexagons

I did say cushions would be a recurring theme on this blog!

This one was made with some gorgeous vintage fabrics given to me as a Christmas present.  Hexagons are  time-consuming, but I think the hours spent on this cushion were worth it.

I have to admit I did cut corners in the process.  You are supposed to cut out paper hexagons (I cut mine from old newspaper, but you can buy paper hexagons to save time if you want) and then tack the fabric patches around these paper templates so that each fabric patch holds its hexagon shape while you sew them together.  However, I found that ironing the fabric patches around the paper templates was sufficient to get them to hold their shape while I then sewed the edges together.  I took a fairly haphazard approach to this cushion, rather than organizing the hexagons in any pattern, which I think this was the right approach for this cushion.


This was also the first time I have put a zip into a cushion cover.  I did feel rather ambitious when it came to reaching for the zipper foot on my sewing machine, but it actually went ok.  The fabric is slightly warped in places along the edge of the zip, but the zip does zip up, so I'm happy!

Life is too short sometimes, and yes, I did take a shortcut; I didn't do everything you are supposed to do when working hexagon patchwork, but I don't think the final result has suffered for it.  So not perfect perhaps, but good enough!

Thursday, 11 October 2012

Women for Whales


When a friend announced her intention to attend an event in support of Women for Whales (a campaigning group run by our surf instructor among others), it seemed a perfect opportunity for me to channel my creative enthusiasm into something which would have a broader purpose than just looking pretty.

I really liked the idea of using a technique that was a traditional woman's craft associated with the home and using it to create a banner that would be used in a women-led protest aiming to reach out and raise awareness.

A successful protest banner should attract people's attention and clearly convey what it is about.  I hope you agree that this design succeeds against those criteria!

The overall design looks deceptively simple.  The whale is made up of rectangles stitched together.  Oxfam sells packs of recycled cotton squares, taken from offcuts in textile factories, ranging in colour and pattern.  I had a few of these packs which I had bought for a rainy day (or rather until I came up with an idea on how best to use them) and so I raided these for blue cotton squares.

I started by sketching and cutting out the design of a whale on paper and cutting the square cotton patches in half to create rectangles.  These I separated by shade.  I was lucky that one of the pieces had a circle, which was perfect for the eye.

I arranged the rectangular pieces in lines over the paper whale pattern, trying to use those pieces with a white pattern to represent the underside of the whale.  These pieces were then sewn end-to-end to create long strips, which were then lined up side-by-side and sewn together.  The resulting patchwork was then trimmed to size and appliquéd onto the white sheet (I had already cut this to size and sewn a hem).

I kept the design of the letters simple to make life easier for myself.  I think the bold lettering works fine though, and at least is legible.  The orange fabric is something I had used as a sarong at one point, but hadn't been worn for several years.  I think the bright orange works well with the blue and the pattern of bright small flowers adds a feminine touch.

This banner got its first outing in Brighton, at the annual paddle round the pier event (the photo is one taken by my friend at Brighton Beach).  Women for Whales are continuing their campaign, so hopefully it will get a few more outings yet.

Oxfam's Ethical Collection recycled cotton squares can be bought here.

You can read about Women for Whales here.

Thursday, 20 September 2012

A Trip Around the World


Having completed my first quilt, the prospect of starting the next was a little less scary.  When I heard the news that two of my close friends were expecting their first child, I quickly decided that I wanted to make a cot quilt for when the new baby arrived.

Choosing the fabrics for this quilt was really fun.  I went with bright, sunny fabrics, which would be suitable for a girl or boy.  I wanted to include a nursery pattern, but nothing too cutesy, so I was really pleased when I found this red alphabet fabric at Doughty's shop in Hereford.


This pattern is called Trip Around the World.  The new parents are keen travellers and so I thought this would be a perfect pattern to adorn a quilt for the new addition to their family.

As I was on a deadline, I decided to make this quilt by machine rather than by hand to ensure I had it finished in time.

I made this quilt using the strip-piecing method.  There are already plenty of instructions on the internet for this pattern, so I won't try to explain the detail here when others have already done a much better job than I could hope to.  For an example of instructions with useful diagrams, see this so-called "idiot's guide".

This method involves sewing strips of the fabric together to form a complete loop.  This loop is then cut widthways, so you are left with loops made up of squares of each of the different fabrics.  The trick is to then unpick these loops so that you have strips made up of the different fabric squares sewn together.  These are then sewn together to build up the pattern.

Making this patchwork top by machine meant it grew fairly quickly, and it was really pleasing to see it progressing.

For the quilting, which I also did by machine, I decided to use a basic pattern of straight lines to emphasis the diagonal lines of colour on the patchwork top.  It also makes a pleasing pattern on the reverse of the quilt.

I have written previously about my first attempt at mitered binding.  This was my second attempt, and I think I can see improvement, which is always encouraging. 


Making this quilt was not without its frustrations.  I always want to do things well, and this time I particularly wanted to do a good job as this quilt was going to be a present.  It was frustrating when the seams of some of the squares did not match up perfectly, or the machine quilting did not stay true.  But this is the nature of quilting, and something I need to accept if I am to be a quilter.  Making this quilt has helped me accept this.  It is lovely to be able to make something for a special new baby, and my friends are really pleased with the quilt.  Being able to make things for people you care about is a wonderful thing.  Thinking about it this way helps me realise that projects like this really aren't about striving for a perfect make.  They are about the time and thought invested in them.  And I am not going to let a bit of frustration over minor mistakes stop me making things for the people I care about.

The finished quilt measures 86x100cm approx.

Monday, 3 September 2012

A quilter at last


This is not the first patchwork quilt I’ve started, but it is the first one I’ve finished.

I fell in love with patchwork quilts on a trip into Amish country as an impressionable teenager during a family holiday in the USA.  I came back from that holiday and immediately ordered a book about patchwork.  It would be a few more years before I started my first quilt (a log cabin design which over ten years later I still haven’t finished).  When I was given some gorgeous vintage fabrics for Christmas I knew that I wanted to try patchwork quilting again.


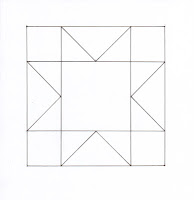
For some time I had wanted to try the Ohio Star block and leafing through some old patchwork quilting books I found a lovely design for a small quilt using a combination of a variation on the Ohio Star block pattern and a framed Nine Patch block pattern.   

This is a simple variation of the Ohio Star pattern block. Click here if you would like to read a brief history of the Ohio Star Quilt on ehow.com.


The finished quilt measures 57x57cm

Like any budding quilter I have managed to accumulate a stash of fabrics over the years, either through unwanted fabric donated to me by others or fabric left over from my previous projects.  A quick rummage through my collection uncovered the dark blue fabric used to frame the Nine Patch blocks and which is also used as the backing fabric.


 As this was my first attempt at quilting (the sewing together of the three layers) I decided to keep the quilting design straightforward and so I used a simple grid design, crossing in the centre of each patchwork block.


The quilting pattern stands out on the back of the quilt


All the sewing was done by hand, except the binding, which was machine stitched to the front side, then folded over the raw edge of the quilt and hand sewn to the back.  Mum taught me how to do these mitered corners.  I still have some practice to do to get them perfect, but for a first attempt (with more than a bit of motherly assistance!) I'm rather pleased with them.

If you want to try this binding technique there is guidance on this quilting website explaining how to sew mitered binding, including these mitered corners.

This quilt is not perfect – the lines don’t always match up as they should and putting the binding on didn’t always go to plan.  But once I stopped scrutinizing the details, took a step back and let go of those criticisms, I found that I was pleased with the overall effect and, dare I say it, a tiny bit proud of my first little quilt.  And yes it may be small (I don’t know that it would even qualify as a lap quilt!), but I think the fact that I actually managed to finish this one just goes to show that taking baby steps can lead to beautiful results sometimes.

It's been 15 years since I fell in love with quilts and having finally completed one I feel I have at last earned the right to call myself a quilter.  And seeing as my infatuation with quilts started when I was staying in Ohio, it seems fitting that my first completed quilt should include a variation on the Ohio Star block.