Saturday, 24 August 2013

Cheese scones

The weather has been miserable today.  Never mind; the cricket may have been rained off but I still had TMS to keep me company, and what better excuse is there than a wet Saturday to get in the kitchen and indulge in some baking.

And this isn't just any baking - this is baking with Betty's scone recipe.  I have previously had successful results with this recipe when I used it as the basis for my blueberry and lemon scones.  Today, I decided warm homemade cheese scones would be the perfect lunch-time treat on a wet and dreary day.

Cheese scones are really very easy to make, and everyone is likely to have the basic ingredients in their store cupboards (flour, butter, eggs, milk, cheese).  Putting the ingredients together doesn't take long, and then it's less than 15 minutes in the oven before you're taking them out.  Then the hardest part - having the patience to wait until they are just cool enough to eat!

Warm scones with melted butter, a cup of tea, the Saturday papers and the whole of the afternoon stretched out before me; who needs the sunshine?

baking


Sunday, 18 August 2013

Large nine-patch quilt - stage 1

I've started work on some bunting today - can't tell you more at the moment because it's going to be a present.

What I can share with you is the news that I have finally (having started them last summer) finished all 16 of the framed nine-patch blocks for a large quilt I am planning.  There is still a lot to do, but this is a very pleasing milestone to have reached.

quilting


Oxfam used to sell recycled cotton squares (part of its Ethical Collection). I was so taken with the patterns, I bought several packs with no particular project in mind and put them away in my sewing basket for the proverbial rainy day.  When I set myself the challenge of making a banner for my friend to take with her when she went campaigning for the group Women for Whales, the blue and white patterened squares were perfect for a whale.

I knew I wanted to use the rest of the squares for quilting, but the question was what patchwork design.  I toyed with various ideas, but in the end I went for nine-patch blocks.  I felt that these were the best use of the fabric as this design made the most of the pre-cut squares and was the best way of showing off the varied, fabulous patterns.

The idea of framing the squares came later (an idea from my Mother), and for this I used unbleached calico.  I think it frames the squares perfectly.  You can buy pre-washed calico quite cheaply - I got mine from Doughty's.


quilting
Excluding seam allowance, each framed block measures 40x40cm

The next step will be to quilt each square before joining them together.  I did the patchwork by hand, but I may do the quilting by machine.


quilting

There are still decisions to make - what quilting design to use, what to use as a backing fabric, and what fabric to choose to join the squares.  As ever, I'll let you know how this project progresses...


Sunday, 11 August 2013

Victoria Sandwich

cake
  
A summer classic: the Victoria Sandwich.  For this I used a recipe in the Great British Book of Baking.  This is the second time I have used this recipe and both times it has made a beautiful cake; the recipe is easy to follow and produces a lovely sponge.

cake
Both times I've made this cake it has garnered compliments, but it is easy to make and it is the finishing touches that I think make it special: the dusting of icing sugar, the fresh raspberries and of course this beautiful cake stand.

I have to say a word about the cake stand.  It was given to me by my Grandma after my Grandpa very sadly passed away.  The stand originally belonged to Grandpa's mother, and as Grandma isn't using it she very kindly gave it to me.  It gives me great pleasure to be giving it a new lease of life: I like to imagine that my Great-Grandmother at one time used it to present her own Victoria Sandwiches at gatherings of family and friends, and I am simply one person in a line of home bakers.  There is something about the permeance of objects handed down: it was here before you and it will in all likelihood be here after you.  Whatever seems so terrible today is really nothing more than a fleeting moment; more than a cake stand, it's a sense of perspective.

There's an interesting summary of the history of the Victoria Sandwich here (along with some good tips for making your own) - even including Mrs Beeton's recipe from 1861.  The Victoria Sandwich cake is named, as one would expect, after Queen Victoria.

For a cake whose joy is in its elegant simplicity, there is nevertheless plenty of competition to create the "perfect" Victoria Sandwich, and you can find yourself being judged on the choices you make.  Caster sugar or icing sugar?  Cream and jam, or just jam?  What kind of jam?  Cream or jam first?

I was reminded of this when handed a programme for my local Royal Show.  This includes strict instructions for making a Victoria Sandwich (and note these are still given in imperial!):

Divide between two 8" sandwich tins
3 large eggs
6oz butter (or margerine)
6 oz castor sugar
6 self-raising flour
raspberry jam
castor sugar on top

As you see, this recipe requires castor sugar on top.  This is also the approach taken by the WI and Mary Berry.  I used icing sugar, which I prefer for being light and soft on top of the cake - and is what the Great British Book of Baking recipe goes with.

On the cream and jam issue, I say one must have both (this is a treat after all), although the more traditional approach is jam no cream - but let's not treat that as sacrosanct (and Mary Berry says it's fine to add whipeed cream, so that's ok!).  And there's something rather therapeutic about whipping cream - that with a bit of patience and a spoon you can create white peaks of airy fluffiness.

As for flavour of jam, I say go with what you like.  I went with raspberry, but blackberry jam would be a great autumnal twist I think.

The advice I would give is to make sure you properly grease/line your cake tins - make the process of releasing the sponges as easy as you can for yourself.  The sponges can be made the night before, and you can whip the cream up the next morning and leave in the fridge until you use it, but I would recommend leaving it until the last possible moment before assembling your layers.

My Victoria Sandwich may not match the expectations of the traditionalists, and its not going to win me any prizes, but it was fun to make and even more enjoyable was sharing it with friends over a long overdue catch-up.  A perfect Saturday afternoon.


cake

Sunday, 4 August 2013

Clothes peg bag

A relatively straight-forward, quick project this time.  I don't know why, but there was something that felt very grown-up about getting my own washing line.  Putting it up was just another one of those little things that goes towards making the house feel like my home.

A clothes line needs a clothes peg bag, so I took a break from working on my tablecloth to have a go at making my own.  I remembered that this was one of the projects in the Cath Kidston book Sew! a friend had given me a while ago (and which I have mentioned before on this blog) and I used this project as a basis for making my peg bag.

It was very helpful to have instructions on which to base my design, although I didn't follow these exactly.  For example, in Sew! the pattern is based on using a 30cm coat hanger, and it suggests that if you can't find a hanger of that size you could shortern a standard hanger by using a hacksaw to cut it.  I didn't really fancy trying to cut bits off a plastic hanger, so I used a standard wire hanger and drew my own template based on this.  Using a wire hanger was a benefit when it came to inserting it into the bag at the end, as it is malleable and could be moved into place easily.


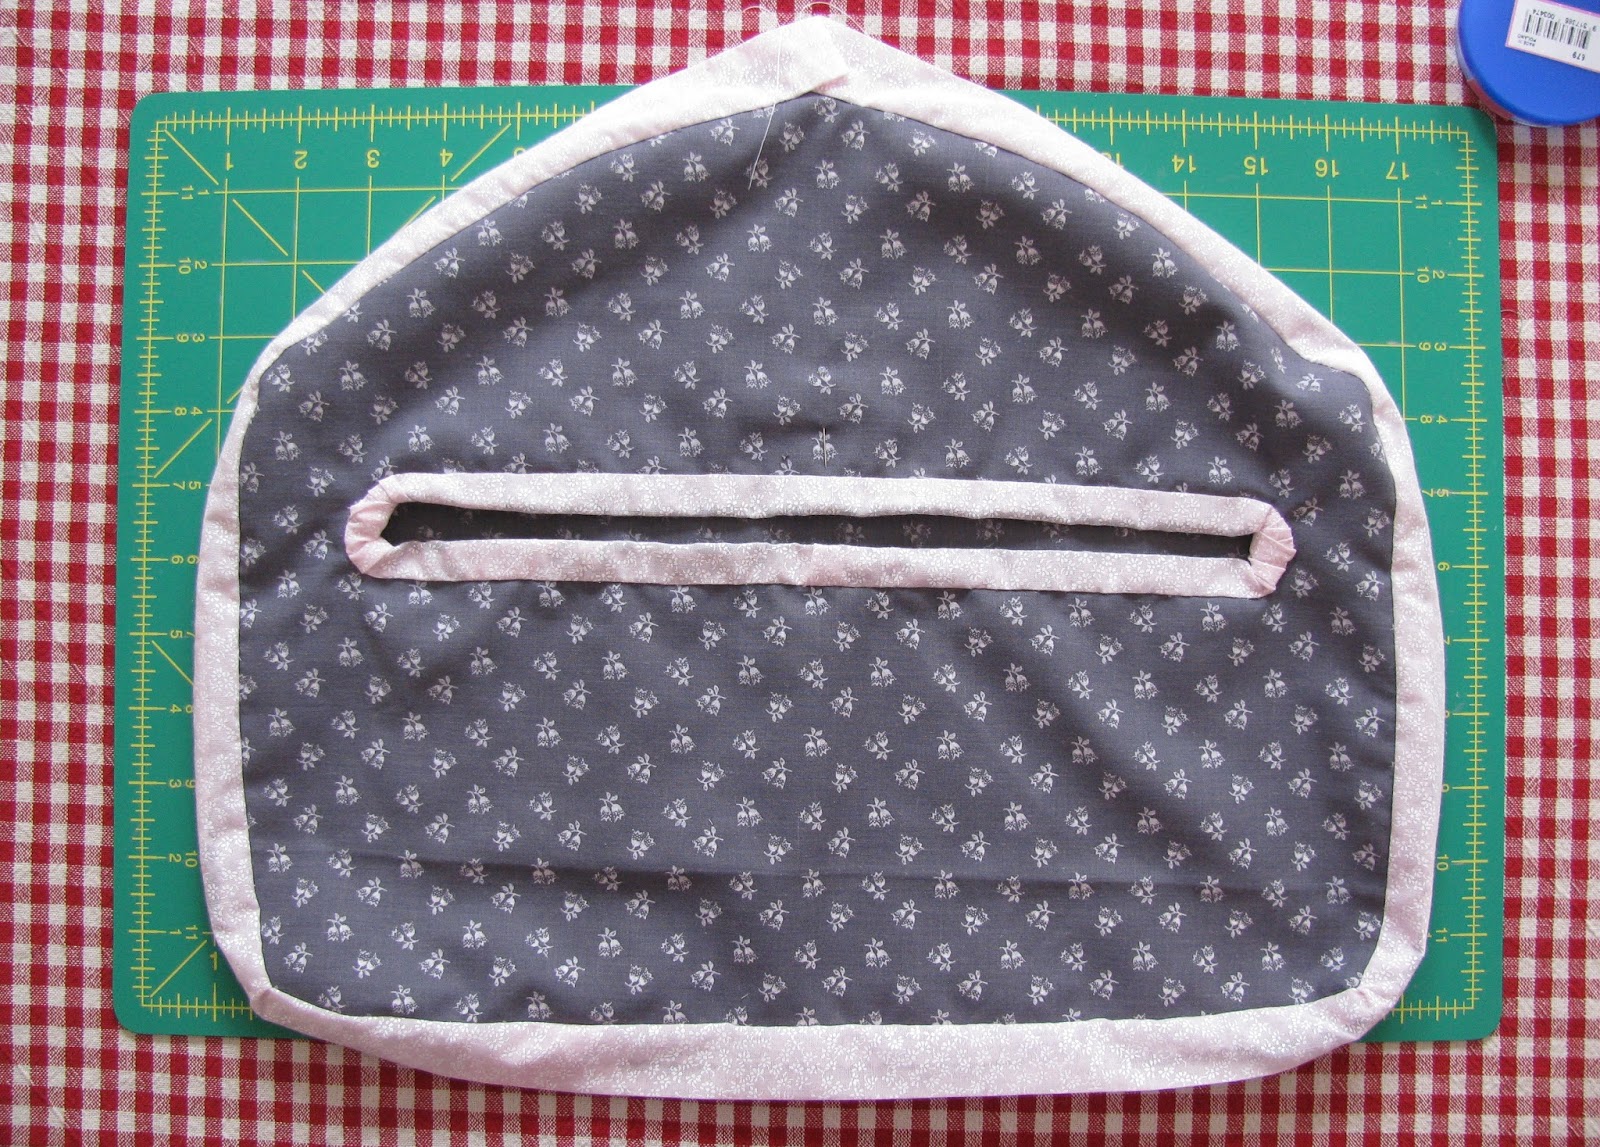
The bag measures approximately 41cm (w) x 33cm (at the highest point)


I'm really pleased with the final result.  And because I already had the fabric (which in fact had been given to me some years ago) and used an old wire hanger, I've got this lovely clothes peg bag at no cost, except the couple of hours I spent on it, spread over two weekends.  So lots to smile about.  I've already been putting the bag into use and as a home-made addition to the ritual of hanging out the washing I'm glad I invested the time to make my own.

This is an easy, quick project and I would urge anyone to have a go.  I used a sewing machine, but it isn't necessary (it would just take a bit longer to do it by hand, but not much).  There are lots of ways you could embellish the basic design.  For example, if I were to make another clothes peg bag I would think about adding letters (in the same fabric as the binding) to spell the word "pegs" across the front of the bag.

Here's how I made the bag:


Using the hanger as my starting point, I drew a paper template and cut out two pieces of fabric.


I made bias binding by cutting strips of fabric, cutting the ends on the diagonal (45 degrees) and sewing these together, then folding and pressing the edges.


I cut a narrow slit in the front piece.  I first pinned the bias binding into place around the slit on the right side of the fabric, folding it into pleats at the corners.  Having sewn this into place (by machine), I folded the bias binding over the raw edge and hand stitched the binding into place on the wrong side of the fabric.

I found the folded corners very tricky, and they could be neater.  I think next time I would try to think of a better way to do the corners (e.g. two straight strips of binding rather than trying to go around such tight corners).

The next step was to join the two pieces of the bag together.  I lay these pieces down wrong side to wrong side.  I pinned the bias binding into place around the edge (pinning through all three layers of fabric), starting from the top (so as to leave a gap for the hanger) and putting small pleats in at the two bottom corners.  I machine stitched this into place, sewing through all three layers (the bias binding and the two main pieces).


I then folded the binding over the raw edge and hand stitched it on the back of the bag, before the final step of inserting the hanger.

Thursday, 18 July 2013

Tablecloth with bird applique - stage 1

A small success - I have completed the edging on the tablecloth I am working on.


The tablecloth is a length of cotton sheeting, which I cut to size for my dining table.

To add the edging, I followed these steps:

I hemmed the raw edges of the cut sheeting to prevent fraying.  This was probably not strictly necessary and if I ever carry out this project again I would think about missing this step.  The picture shows the "wrong" side of the tablecloth.

I wanted to use a mix of fabrics for the edging, so I cut small lengths of fabric which I then joined together to create one long strip.  I pressed the seams and also folded and pressed the edges.

This is a picture of the "wrong" side of the tablecloth taken after I had sewn the strip of edging to the "right" side of the tablecloth.  I did this by placing the strip of edging, right side down, on the right side of the tablecloth.  I then used my machine to sew these together (the top line of sewing in the picture), folded down the edging to reveal its "right" side and ironed along the sewn line.

On the back, I hand stitched the edging, sewing along the fold to create a neat edge and making small, hidden stitches.


I am pleased with my neat corners.

The next stage will be to add the birds (a few of which are pictured below). You may recognise the shape - I used the same Cath Kidston template on this cushion and as a basis for my Christmas robin.  I used Bondaweb to help attach the wings; it's easy to use and I am pleased with the results.  I'll be using Bondaweb to help fix the birds onto the tablecloth.  And of course I will share the results with you as soon as I am done!


Sunday, 14 July 2013

Creating a better mood


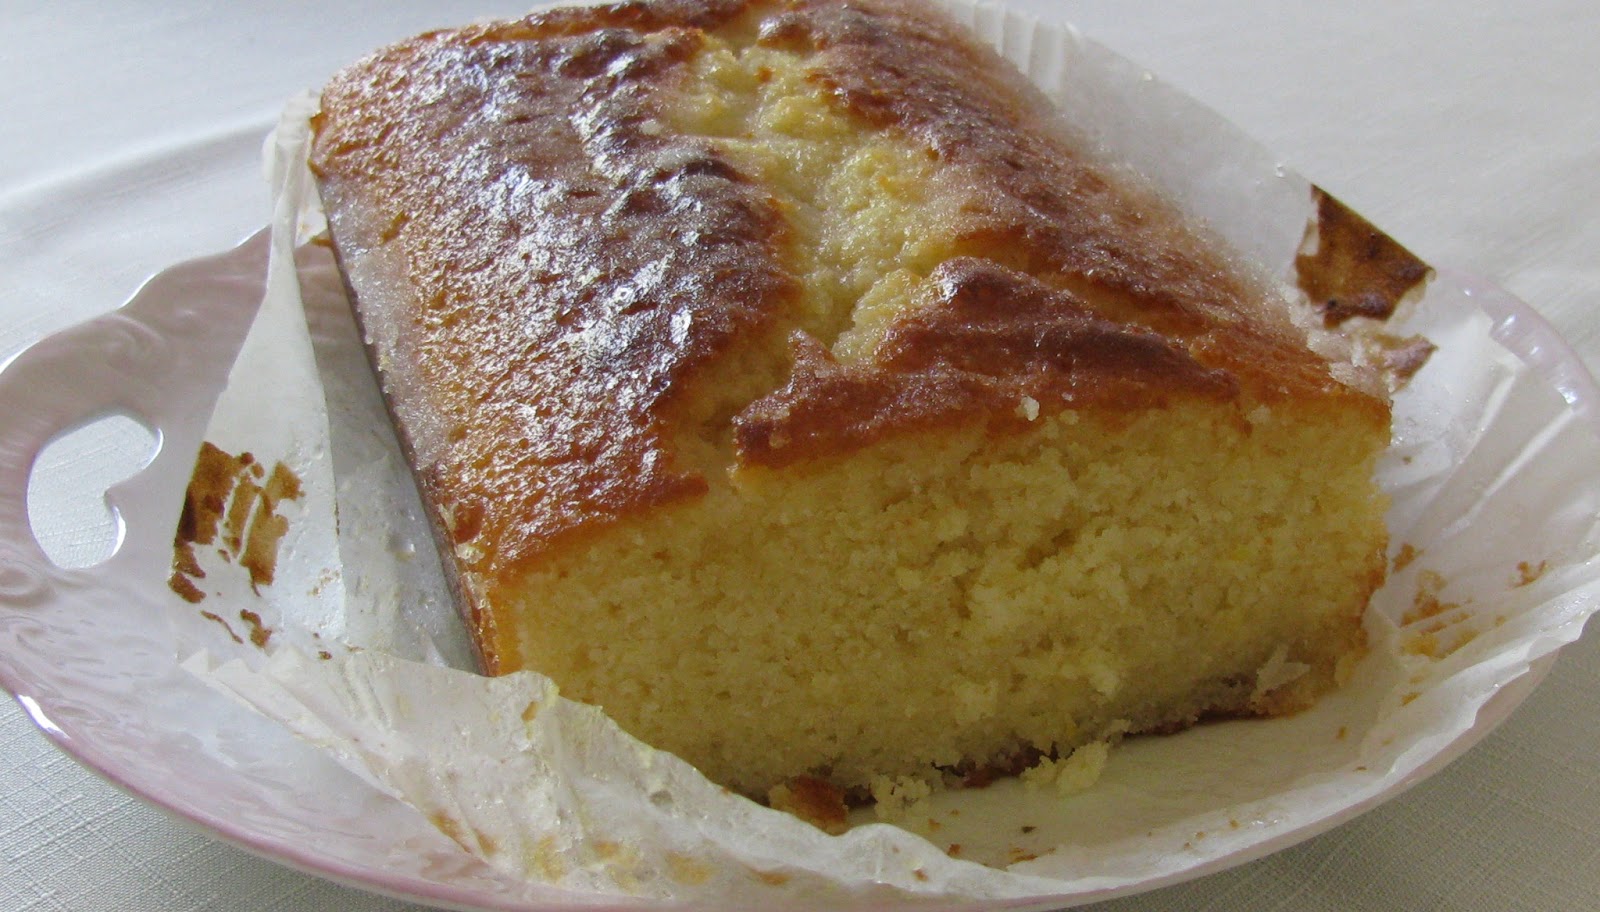
Lemon drizzle loaf cake: easy to make, and the combination of lemon zest, juice and sugar provides a sweet, zingy lift to any day; it's a joy to prepare as well as to eat.

"They say baking soothes the soul" 

Interesting article in the Guardian last week about whether baking can improve mental health.  Journalistic hyperbole?  Quite probably.  However, the benefits of creative activity helping your mood is not new. Alys Fowler has written recently about how gardening can have a positive effect on mood.  Monty Don is another gardener who talks about the pleasure of gardening, and has written that "Gardening should, first and foremost, be a pleasure.  If you are not enjoying it then you can be pretty sure that you are doing something wrong".

I try to take the same attitude to the things I do; that when sewing, baking or whatever activity it may be, I am doing it for my own enjoyment.  Once it stops being something that I take pleasure from and instead becomes a source of frustration and failure, it is time to take a break.

Maybe the benefit comes from focusing the mind (similar to the technique of mindfulness).  There is also a meditative quality that comes from the repetitive action of sewing or stirring ingredients together.  It is an opportunity to slow down and focus on what you are doing in that particular moment.

Knitting can be a way to find calm after a busy day - counting stitches instead of sheep!
The words "slow down" are important.  I enjoy baking when I can do it at my own speed, pottering about the kitchen with the radio on in the background.  I think this is why I like baking but find cooking horribly stressful - a meal has to be ready at a particular time, and all the elements have to be ready.  You can take as long as you want to make a cake, it's not going to spoil, and is not normally being done to a particular deadline (I make most of my cakes the night before they are going to be eaten).

And let's face it, creative activity can also be about positive reinforcement, an opportunity to think "wow, look what I can do".  I'll be the first to admit I haven't always been good at recognising my own achievements, but I am trying to get better at this.

There is one big proviso though - it doesn't matter if what you try doesn't work. Baking, sewing or any other activity will never be an aid to improving your mood if you start your task expecting perfection. But pausing to enjoy the process can be its own reward, regardless of the results.  The best thing we can create is a calm mind and a sense of contentment.

Ok, so this is a little bit decadent, but sometimes its nice to spoil yourself - chocolate cupcakes topped with my favourite chocolate?  Oh go on then...


Saturday, 6 July 2013

Knit one, purr one

Oh dear, more than a week on since my last post and still no new finished project to bring you I'm afraid.  Not that I haven't been busy; here's a sneak peak of a tablecloth I'm working on...


My most exciting news from the past week is that I have a new house-mate - a black cat called Leonard.  He was abandoned by his owners and lived as a stray for a while before ending up at Battersea Cat Rescue, which is where I met him.  He's a really soppy boy, who loves his food and being fussed.  Having him in the house really makes it feel like a home.

He's getting quite comfortable, and loves sitting next to me on the sofa, curling up on a dining chair next to me as I work, or getting comfy on the armchair.  I don't have the heart to discourage him, but of course the downside is the hair he leaves behind!  So I'm covering everything in old towels and blankets.  Which reminded me...


At the end of last year I started knitting small squares to practice different knitting patterns.  The arrival of Leonard has prompted me to get out my knitting needles again - my plan is to make lots of patterned squares which I can then join together to make a blanket for Leonard to curl up on and which will hopefully protect my furniture!  However, there is a flaw in my plan - well, have you ever tried knitting with an inquisitive cat nearby?


I'll keep you updated on progress...